Wednesday, April 25, 2007

Windsong DYBrr, Cher

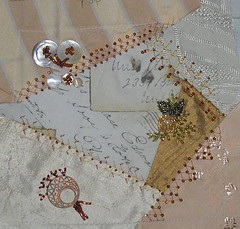
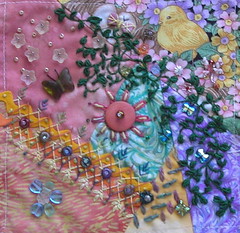
This is the final block in the Windsong round robin. Cher choose such wonderful peachy colors and I tried to stay within that color range. I added some seam variation that I then beaded, a bit of a buton trail, a "fan" made out of an earring finding and a beaded cabbage rose with beaded fly stitch leaves and beaded feather stitched greenery! Enjoy!

TradeWinds DYB rr, Jo

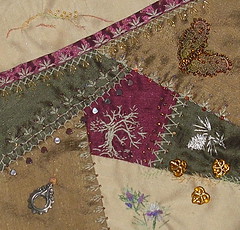
This is another block that I stitched on for Jo in the Tradewinds round robin. I wound up being a "stitch angel"! LOL!!! On this one I tried to give her more of a flavor of Colorado. There is a small mountain scene on the upper left wit a beaded reflection of the sunset. I put some lilac and Colorado columbine in the lower right corner, a pinyon pine tree in the center and a pine cone and needles off to the right. The seam treatments are varied , but pretty much my standard. One day i'll get caught up enough to go back and do some exploration with TAST! I also added a butterfly motif and complimented it with beading.

Tuesday, April 24, 2007

Ramblings....

I'm not one to typically sit down and chronicle.... I just meander around in my head, checking out a myriad of paths and thoughts. I've been working on one though for several days (it originated from reading a blog of another cqer) and decided that its just plain screaming at me to be physically expressed.... SOMEWHERE! So, I chose here! Who knows, might start a new trend for myself! LOL! I am going to refrain from "pointing" to the post of my cyber friend. I don't know all of her story, but I do feel her pain and disappointment. I too have had that experience and am trying to find ways to help deflect further negative experiences from happening if possible.

I LOVE crazy quilting!!! It is the best overall way to express EVERYTHING that I am or could be. All kinds of "art" processes are used and many, many more are just coming into being as TONS of creative folks explore textiles and its assorted mediums. There are a bunch of online groups, such as those at Yahoo groups and Quiltropolis, that help support the addictions that go along with this form of creative expression....and within those groups are sub groups of folks that participate in what is called a round robin.

What is a round robin? It is an activity where a person creates one or six cq blocks. That block(s) is then mailed to an assigned partner within a group of 5 or 6 people. It will be stitched on by that partner, adding stitch variations, embellishments, fibers....whatever "means" they want to decorate their portion of the block. Then the block(s) are moved on to the next person in line. This is a great way to see new ideas and LOTS of creativity.

Hand in hand with this, however, comes the occassional problem and disappointment. Not everyone puts the same amount of effort into their work and at times do no more than add a button or two then send it on. The reasons for this could be as simple as they had "life" get in the way, but couldn't find a way to tell anyone about it. Maybe illness, maybe they got overwhelmed seeing all the other work being done or had too much on their plate to really be able to give the block the appropriate attention. This wouldn't be so bad if it weren't for the fact that, that person is very likely to get a wonderfully embellished block back without putting forth any true effort.

I don't know where the answer or solution to this problem really lays. I do know that we all are easily distracted and can quickly become overwhelmed with projects because there is SO much out there to learn and experiment with. I would like to encourage (whomever may pass this way) to stop for a moment, before committing to a new swap or round robin and think about everything that has to be done in your world. Maybe you will discover that the timing is just right for that particular rr and you will be able to show your best work and skills. Or... maybe you'll find that there is a little too much going on and need to wait for a different opportunity. Regardless, it is important that we ALL give our very best when sharing with one another so that disappointment or hurt feelings do not occur. Think how you feel when you get your gorgeous block home.... the excitement and wonder it creates! Lets ALL try to give that feeling back! We are, after all, Crazy Quilting Buds!!!

Wednesday, April 18, 2007

Trade Winds rr block for Emiko


DYBTWEmiko
Originally uploaded by Pinyon Creek Stitchin'.
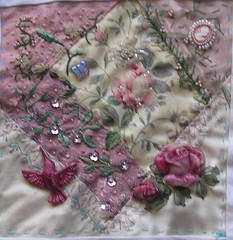
This block is for Emiko! The last for this round robin! I really enjoyed working on this block! The colors are so soft and I can almost smell the roses! :_)) wanted to maintain the garden feel of this block so I created some vines over the blocks. I also added some seam variations from TAST (altho i'm waaaaayyyy behind there) and finally added a cameo and created some fimo flowers and a little hummingbird...to show a bit of the US/Colorado for Emiko!!! I hope that she enjoys the block! It was fun working on it!

Thursday, March 08, 2007

Art Bra Quilt Block 2


abqb2
Originally uploaded by Pinyon Creek Stitchin'.
Hhere is the second block for the quilt. LOTS of sre, some beading, dimensional embroidery and stitch variations. This block is symbolic of life bursting forth on sparkling wings from a "broken" heart flying joyously to health and happiness!

Art Bra Quilt Block 1


abqb1
Originally uploaded by Pinyon Creek Stitchin'.
Hi everyone!!! Goodness, I didn't realize it had been so long since I posted! I've been busy stitching and changing email addies and, and, and!

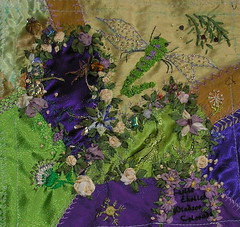
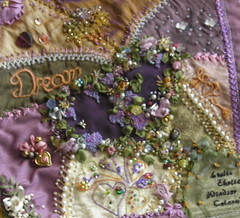
This is the first of two blocks that I did for the Art Bra Quilt project. The quilt itself will be hung in a cancer center in tribute to women and breast cancer. The theme this year was hearts and the colors were to be purple (primary) and jewel tones or victorian tones. Purple is NOT one I work with a lot so this is definately a challenge for me! :_) This particular block is a healing block. I have stitched lemon citrine and aquamarine into it along with a lot of other beads (of course)!!! On the left side I embroidered "dream", on the right side "hope" and at the bottom "life". All the blocks were to have our name and city/state or country in the bottom right corner. I have lots of stitch combos on here.... a tribute to TAST (www.inaminuteago.com) along with silk ribbon embroidery,dimensional embroidery, lace embellishment... hmmm....did I leave anything out? LOL!!! At any rate...enjoy!!!

Wednesday, February 14, 2007

WSDYB Kari


WSDYB Kari
Originally uploaded by Pinyon Creek Stitchin'.
Another block done and i'm caught up on rr's! Woohoo!!! This one has more TAST (www.inaminuteago.com) variations. I saw this block as having a window in it with herbs and flowers drying on the beam above. I did a fly stitch lace on the ledge and the usual of the herringbone beaded variations. On the left side I did a seam with algerian eyes and detached/beaded chain stitches and above that, is a doubled herringbone with detatched chains, pearl knots and beads. The yellow seam treatment is a small fly lace (one row) with detached chain rosettes and pearl knot below them. Then, the yellow patch contains a neat little glass pansy bead and some glass leaves with lilac beads scatter around them all over a seam of detached chain stitches. Enjoy!

WSDYB Clairee


WSDYB Clairee
Originally uploaded by Pinyon Creek Stitchin'.
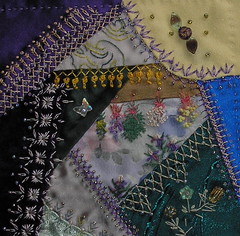
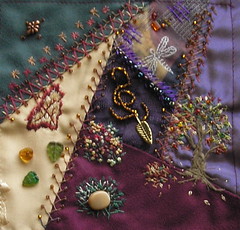
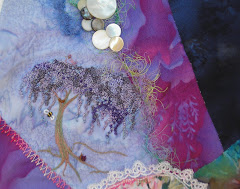
Hi all!!! i'm late getting this posted, but wanted to share with everyone! I have played with some of the different TAST variations (to date). www.inaminuteago.com ...and really enjoyed this block. The maker had requested a tree from me....i'm hoping she is happy with it. I tried to stay withing the color schemes of the block and it felt like "fall" to me! I added the leaves on the tree doing a rather random herringbone stitch that I over lapped in different colors and added a few detached chains as well. I created a "rock" out of a neat bead I found in my stash. It looks neat in person anyway. :_) and placed a fly stitch bush around it. Above it are some fall mums blooming away! Off to the left are some glass bead leaves, and the leaf that was embedded in the pattern of the fabric, I stitched with some silk to pull it out and show off it's colors. Above the leave is a beaded, herringbone, cretan seam treatment with algerian eyes that I varied just a small bit. Last, but not least, is the herringbone seam treatment on the right with beads and detatched chain stitches.

Sunday, February 04, 2007

DYBTW Cheryl


DYBTW Cheryl
Originally uploaded by Pinyon Creek Stitchin'.
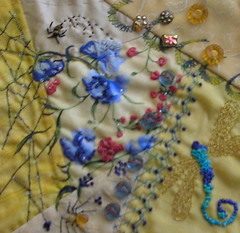
This is another block from a DYB round robin that has been completed..... more additions for the TAST (www.inaminuteago.com) project! I did herringbone for the dragonfly wings, a chevron/fly stitch variation and herringbone curly cues. The flowers on the cotton print are spruced up with some cast on petals and a bit of satin stitching to carry them over to the other block. I also added the metallic DMC thread web with a little spidey to bring luck to the block! I also added a brazilian embroidery bee! One of my favorites!! Enjoy!

DYBTW Ana


DYBTW Ana
Originally uploaded by Pinyon Creek Stitchin'.
This is a pic of a block I just completed for a DYB round robin i'm in. There are versions of the detached chain stitch, a herringbone varition so those are my small contributions to the TAST project (www.inaminuteago.com) and lots of beady butterflies and a teensy beaded dragon fly! The vines are topped off with cast on leaves, which I like to play around with for shape and size. This was challenge for me due to the cotton fabric patterns....but hopefully the owner will enjoy it.

Special project


PamWallet
Originally uploaded by Pinyon Creek Stitchin'.
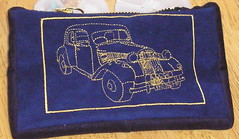
Here I am with another marathon posting session! I haven't figured out how to keep up with blogging AND do everything else that needs to be done! :_) This is a special project I undertook for a friend. It is a small bag for her husband. He owns a Citroen and this is a stitched version of it. I added the border to keep it from rolling off the side of the bag! This was all done to her specifications and is stitched on ultrasuede. I added another layer of ultrasuede to the interior as I put it together to make it more substantial and hopefully absorb some of the wear with use.

Monday, January 22, 2007

Gaga quilt restoed (closeup)


gaga5
Originally uploaded by Pinyon Creek Stitchin'.
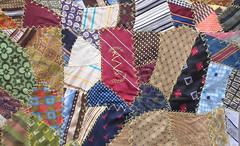
This is just a closeup of the restored quilt and the initial that was embroidered on it. I bracketed it with the feather stitch to stay in the basic "flavor" of the original quilt. All the embroidery on this piece was redone as the thread on the original was disintegrating, pulled or missing. I tried to match the color as best I could, but chose to use a perle cotton instead of the stranded floss to help with wear.

Gaga's quilt restored


gaga3
Originally uploaded by Pinyon Creek Stitchin'.
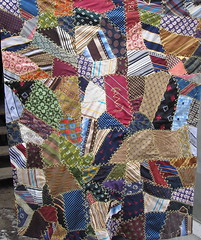
This is a pic of the full quilt restored. Whew!!!! I hope my son will cherish and it lasts another 25 plus years!!! :_) The only differences on this quilt from the original is that I did a couple of variations on the feather stitch and added a bit of herringbone here and there! I didn't realize how tiring it gets to use the same stitch for a project this size. Great learning experience! I also added the family name initial and the approximate year it was made along with the year it was restored on the front. I wish the makers had realized the importance of documenting their information in years past....but....alas...we have to rely on our own memories there! At least I had the opportunity to fix that problem on this quilt! Enjoy!

Thursday, January 11, 2007

TAST Button Hole Stitch


TAST BH
Originally uploaded by Pinyon Creek Stitchin'.
I am participating in Sharon Boggons Take A Stitch Tuesday. http://www.inaminuteago.com/stitchdict/stitch/Buttonhole.html. This is my sampler of some buttonhole stitch variations so far. I've a lonnnnnggg way to go yet, but this is a start. I'm really enjoying the varity of ideas that folks are coming up with for this. First are the flowers that can be made with the button hole stitch. These can be seen at http://www.needlenthread.com/2006/11/embroidered-flowers-using-buttonhole.html. I've actually used this stitch on pansies for some DYB rr's i've been in. It's a great idea for Holly hocks, etc. Then there's Pam Kelloggs ideas that can be found at http://kittyandmedesigns.blogspot.com/ She always comes up with some good information and ideas to use with different stitches. Give them a try! I better get going and see what else I can conjure up! :_)

Wednesday, January 10, 2007

Bee diagram


Bee diagram
Originally uploaded by Pinyon Creek Stitchin'.
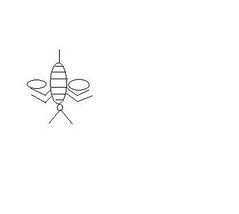
A few days ago, I did a brazilian embroidery bee tutorial. I have since been asked to add a diagram.....and finally got a chance to make it. Each line running across the body of the bee represents the row of cast on stitches. Beginning with the rear row, the sequence of stitches is as follows: 3, 5, 8, 8, 5, 3. That is the number of cast on stitches that you will need to add for each ros. The head is made with a french knot....or a variation of it...I wrapped the needle 5 or 6 times to make a good sized knot. The antennae are made with the fly stitch and the wings are created with bullion knots. I wrapped the needle 35 times approximately. If you want a fatter looking bee or larger wings, all that is necessary is to increase the number of stitches or wraps. I have also made this little "hummer" with all bullion knots! That version is not as fuzzy looking, but is still cute. Another option would be to use the turkey stitch and cut the loops! Now THAT would be a fuzzy, buzzy bee!!!

Cabachon pin


cab swap
Originally uploaded by Pinyon Creek Stitchin'.
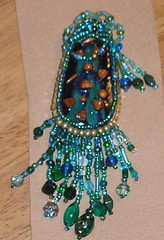
This is also a result of my Fimo explorations! I joined into a beaded cabachon swap and needed to get this done and mailed. I layered the royal blue and the turquoise colors, cut a slice and pressed it in my noodle maker and came out with the base. I cooked that, then decided to add some metallic Fimo shapes which I attached with Liquid Sculpey and baked again. I then glued the cabachon to some interfacing, and started beading. I had no plan (as usual) but simply played a bit and this is the result. I'm a little worried about the loops at the top being a little too much, but...well...since i've already added some ultra suede to the back, i'm gonna have to leave it I guess. It was fun to do and the little group I belong too will be continuing to have swaps, so more are likely to come! Enjoy!

Fimo explorations!


cabs
Originally uploaded by Pinyon Creek Stitchin'.
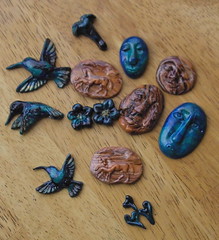
I have also been exploring the wonderful world of Fimo and all that can be created with it. I mixed and mashed and pressed and played and this is a sampling of what I came out with! I think they are kind of interesting....especially the ones that look like wood. But....then.....I love wood and trees and nature and.... :__)

New additions!


Caleb
Originally uploaded by Pinyon Creek Stitchin'.
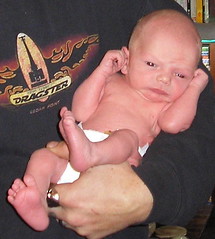
Other happenings on the home front, the day after Christmas....Caleb joined us! He popped into the world, weighing in at a mere 6 pounds, but if he's anything like his dad he will soon be chomping his way thru all the food in the house!

Snowwwwww!!!


122806 snowc
Originally uploaded by Pinyon Creek Stitchin'.
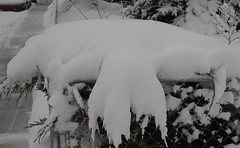
I'm not always the best at keeping up with this blog...and this isn't really stitch related. BUT!!! It is precisely why there hasn't been as much stitching going on as i'd like there to be!!! I have had to keep on bundling up and going out to shovel this WHITE stuff!!! :_) Here in Colorado, we have been absolutely covered up since four days before Christmas! The first snow we got about 31 inches here at my house with five foot drifts. We lost our blazer for a while there! LOL!! Next week we got about 8 inches of it and now THIS week we are supposed to get another 12 inches!!! Sheesh!!! What happened??? I like snow....but....WOW!!!! I thought this was rather a pretty rendition of our frosty covering tho!

Thursday, January 04, 2007

Honey Bee tutorial cont.


Bee10
Originally uploaded by Pinyon Creek Stitchin'.
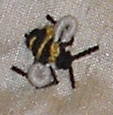
Voila! Completed honey bee!!! I just love to make these little dimensional gems! Sometimes, I will do a twisting, run stitch behind the bee to symbolize the movement and flight of the bee! Let your imagination run wild and have fun!